Sunday, March 28, 2010

Oven "Fried" Chicken

I love this dish so much! I made it for my family for New Year's Eve dinner and for my husband on Valentine's Day. It is also super easy to make. I love fried chicken, and oven fried chicken makes frying no hassle!


Servings: 6

1. 8 pieces of chicken fillet
2. 1 cup all purpose powder
3. 1 teaspoon salt
4. 1/2 teaspoon pepper
5. 1 large egg
6. 2 tablespoon water
7. 1 cup dry bread crumbs with herbs
8. 1/2 cup grated parmesan cheese
9. lemon wedges for serving

Instructions:
1. Preheat the oven to 200 degree celcius or 400 degree Fahrenheit.
2. Rinse the chicken in cold water. Pat dry with kitchen paper.
3. Combine the flour, pepper, salt, on a plate with a fork to mix. Coat the chicken pieces on all sides with the flour and shakes off the excess.
4. Sprinkle a little water on to the chicken pieces, and coat again lightly with the seasoned flour.
5. Beat the egg with the water in a shallow dish. Stir in the herbs. Dip the chicken pieces into the egg mixture, turning them over to coat them thoroughly.
6. Combine the breadcrumbs and grated parmesan cheese in a plate. Roll the chieken pieces in the crumbs, patting with your fingers to help them adhere.
7. Place the chicken pieces in a greased shallow baking dish, large enough to hold them in one layer. Bake until thoroughly cooked and golden brown, 20-30 minutes. (To check if they are cooked, prick with a fork; the juices that run out should be clear, not pink. ) Serve hot, with lemon wedges.

Coconut Shrimp--Hawaiian :)

This is a recipe I found in a magazine at my friend's house. The first time I had the coconut shrimp was at Jackie Chan Restaurant in Hawaii. It was really good but quite expensive. I am glad I found this recipe because now I eat this dish whenever I feel like it!

The original recipe comes with a salsa dip for the coconut shrimp, which I did not end up making myself. But I will share it nonetheless :)


Serving: 2-4

Ingredients:
1. 12 jumbo shrimp (If you don't have jumbo shrimp, I just use large shrimp that I bought from Wal-Mart)
2. 2 cups Vegetable oil
3. 2 large egg whites, lightly beaten. (I used only one egg white for my 20 large shrimp)
4. 1/4 teaspoon salt
5. 1/2 cup cornstarch
6. 1 cup sweetened flaked coconut (I used more than one cup)

Instructions:
1. Peel shrimp, leaving tails on, and devein.(I bought shrimp that are already peeled and deveined)
2. Pour oil into a frying pan. Enough to cover the shrimp. Heat oil on medium high fire.
3. Combine egg whites and salt in a shallow bowl. Place cornstarch in a separate shallow dish.
4. Coat shrimp with cornstarch, shaking off the excess. Dip shrimp in egg white mixture and dredge in coconut.
5. Fry shrimp in 2 batches, 2 to 3 minutes or until golden brown. Drain.

To make salsa, you need to have
1/4 cup mirin
1/4 cup chile sauce with garlic
1/4 cup chopped fresh cilantro
2 cups finely diced pineapple
3/4 cup diced papaya
1/2 cup diced red bell pepper
1/2 cup seeded cucumber
1/4 cup diced red onion

Stir together. Makes 7 cups.

Saturday, March 27, 2010

Twice baked potatoes--Muy delicious!!

I love to hunt for recipes online and try them out. I usually choose the recipes that has really good pictures. I guess I am shallow that way. But I do think that if you want to eat food, you gotta eat something that are pleasing to look at! Anyways, today I bring to you a very very easy recipe. It's actually a recipe from Pioneer Women's site. I am sure some of you know about her cookbook. She has some really good recipes on her site that just look so mouth-watering.

I love potatoes! Everytime I hear the word "potato," my mind goes to the scene in The Lord of The Rings when Gollum asked Sam, "What's tater, Precious? What's tater, eh?" and Sam goes, "PO-TA-TO, boil 'em, mash 'em, stick 'em in the stew." Sorry, I am dorky that way.


On to our recipe!

Servings: 4
Ingredients:
1. 2 large potatoes (washed)
2. butter--1/2 stick or 1/2 cup
3. sour cream--1/4 cup
4. Real bacon bits (don't use the fake kind!!)-as much as you like!
5. spring onions--2 stalk(chopped)
6. salt- some
7. pepper- some
8. shredded cheddar cheese- 1/4 cup

Instructions:
  • Wash, then place potatoes on a cookie sheet. Bake in a 400 degree oven for 1 hour, 15 minutes, making sure they’re sufficiently cooked through
  • Slice the butter into small cubes and then put them in a mixing bowl. Add bacon bits and sour cream to the bowl as well.
  • After the potatoes are done baking, cut them in halves. Potatoes are SO hot at this point so use a cloth to hold them. Scrap the potato with a large spoon into the mixing bowl. Be careful not to tear the shell. Leave a thin layer of potato in the shell.
  • Use the potato masher and mashing the potatoes with other ingredients in the mixing bowl. You can mash until it's smooth or you can have a bit more texture or "lumps" if you like it that way.
  • Add the cheese, salt, and green onions into the mixture. Mix them around.
  • Then, begin scooping the mixture back into the potato shells Keep filling until the filling's all gone. After that, you can top the potatoes with some more cheese.
  • Lastly, put them back in a 350-degree oven for 15 to 20 minutes, or until the potato is warmed.

Potato Gnocchi with Butter and Cheese

My husband wanted me to make this recipe he found in one of the Food & Wine magazines we have.  It was different, but pretty good!

Here is the picture from Food & Wine

Here is what mine looked like.  They were pretty sticky still, so I probably didn't add enough flour on them before cooking them.

Yields: 4 to 6 servings

INGREDIENTS
2 lbs baking potatoes (about 4)
2 large egg yolks
Salt
1/2 cup all-purpose flour, plus more for dusting
4 tbsp unsalted butter (I used margarine, that might have been my problem with the stickiness?)
Freshly ground black pepper
Freshly grated Parmigiano-Reggiano cheese

INSTRUCTIONS
1..Preheat the oven to 400 degrees F. Pierce the potatoes all over with a fork. Bake in a microwave oven at high power for 10 minutes, then flip the potatoes and microwave for 5 minutes longer. Transfer the potatoes to the oven and bake for 15 minutes. Alternatively, bake the potatoes in the oven for about 1 hour, until tender.
2..Halve the potatoes. Scoop the flesh into a ricer and rice the potatoes. Transfer 2 slightly packed cups of riced potatoes to a bowl. Stir in the egg yolks and 1 teaspoon of salt. Add the 1/2 cup of flour; stir until a stiff dough forms. Knead the dough gently until smooth but slightly sticky.
3..Line a baking sheet with wax paper and dust with flour. On a floured surface, cut the dough into 4 pieces, rolling each into a 3/4-inch-thick rope. Cut the ropes into 3/4-inch pieces. Roll each piece against the tines of a fork to make ridges; transfer to the baking sheet.
4..In a large, deep skillet of simmering salted water, cook the gnocchi until the rise to the surface, then simmer for 2 minutes longer. In a large nonstick skillet, melt the butter. Using a slotted spoon, add the gnocchi to the butter. Season with salt and pepper and cook over high heat for 1 minute. Sprinkle with the cheese and serve.

TIPS FROM ME
I chose the option to bake the potatoes for 1 hour in the oven, since I had other things to do at the time and I don't like to run around the kitchen, wait, and run around some more.

I don't have a ricer and I didn't know what one was.  I researched it, and apparently it is supposed to make your potatoes creamy.  Well, I just let mine whip for a while and it seemed really smooth to me!  So if you don't have a ricer, don't sweat it.  Just whip the potatoes as if you were making whipped potatoes.

There are other variations of Gnocchi.  Visit the Food & Wine website to learn how to add some flavor to your Gnocchi.  It's a fun snack or appetizer.  :)

Rosemary Garlic Bread

As a lot of us know, garlic bread takes a long time to make.  Well, this one was worth the time!  It produces 3 loaves, so be prepared.  Make sure you have at least 2 cookie sheets available to make this.


Makes: 3 loaves

INGREDIENTS
5 whole garlic bulbs (not cloves, BULBS)
2 tsp olive oil
1/4 cup miced fresh rosemary or 4 tsp dried rosemary, crushed (I used dried)
1 tbsp chicken broth
9 to 9-1/2 cups bread flour (i used all-purpose flour)
1/2 cup sugar
3 packages (1/4 oz each) quick-rise yeast
3 tsp salt
1-1/2 cups milk
1 cup water
3/4 cup butter or margarine, divided (i used margarine)
1 egg
1-1/2 tsp garlic salt

INSTRUCTIONS
Remove papery outer skin from garlic (do not peel or separate cloves). Cut top off garlic heads, leaving root end intact. Place cut side up in a small baking dish. Brush with oil; sprinkle with rosemary. Cover and bake at 425 degrees F for 30-35 minutes or until softened. Cool for 10 minutes; squeeze softened garlic into a bowl. Add broth; lightly mash.

In a large mixing bowl, combine 3 cups of flour, sugar, yeast and salt. In a saucepan, heat milk, water and 1/2 cup butter to 120-130 degrees. Add to dry ingredients; beat just until moistened. Beat in egg and garlic paste until smooth. Stir in enough remaining flour to form a soft dough (dough will be sticky). Turn onto a floured surface; knead until smooth and elastic, about 6-8 minutes. Cover and let rest for 10 minutes.

Turn dough onto a lightly floured surface; divide into thirds. Divide each portion into three pieces; shape each into an 18-in. rope. Place three ropes on a greased baking sheet and braid; pinch ends to seal and tuck under. Repeat with remaining dough. Cover and let rise in a warm place until doubled, about 30 minutes.

Bake at 350 degrees F for 15 minutes. Melt remaining butter; add garlic salt. Brush over bread. Bake 10-15 minutes longer or until golden brown. Remove from pans to wire racks to cool.


TIPS FROM ME
 It was my first time roasting garlic.  Make sure to use a very sharp knife to cut off the heads of the garlic or you may end up breaking off some of the cloves.  This happened to me on two of the bulbs, but then I sharpened a knife and all was well afterward.  Also, if some of the cloves are small (like some of mine were) then cut the heads of the small ones off separately from the rest.  It's best to attempt to leave as much garlic as possible.

Make sure you cook the bulbs long enough!!  I should have left mine in for about 5 or 10 minutes longer.  When I attempted to squeeze them into the bowl, it was tough and I was burning my hands.  I attempted to use oven mitts to avoid the heat, but it was harder to squeeze them.  Also, be aware that you might get some of the garlic shells in the bow.  Be aware and remove any shell that falls into the bowl.

Use a light-colored cookie sheet if possible.  The dark ones will cause the bottom of your bread to cook too fast.  If you don't have a light colored cookie sheet, make sure to move the oven rack up higher so the bottom of the bread doesn't cook so fast.

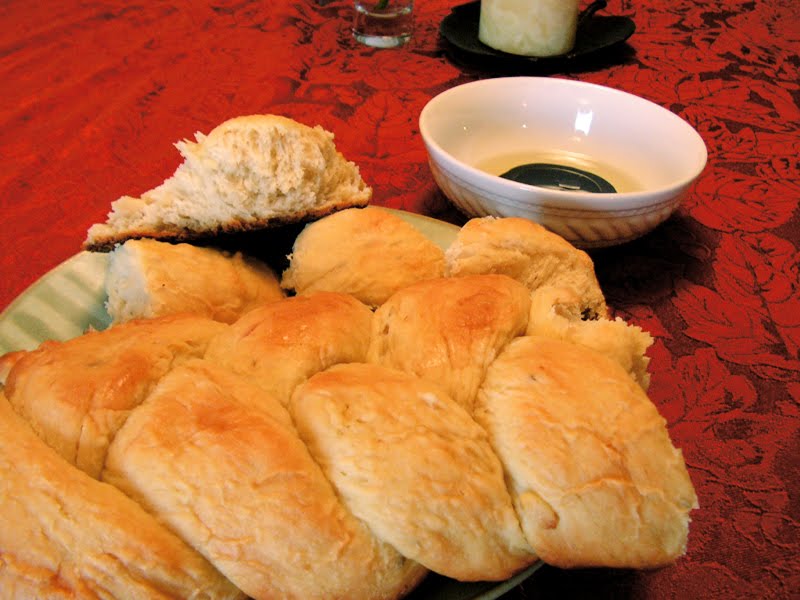
The bread tastes best straight out of the oven.  Enjoy with some oil and balsamic vinegar or any dipping of your choice.  Definitely a favorite.  Yum!